Friday, July 19, 2013

DinnerLove: Pasta!


Cruising the grocery store isles, I frequently see shelves loaded with bags and boxes of countless types of pasta. An interested shopper could spend half an hour perusing the options. Even someone with less than a dollar can find something as long as they had a few pennies to pay the tax. Pasta is cheap.
The cheap pasta, however, can be doughy and easily overcooks, resulting in an insipid, squishy mess that is only fit for the dog's dish or the compost bucket.
Higher quality pastas are a terrific choice, but can be expensive, with a high carbon footprint- most having been transported from Italy, where all pastas originated hundreds of years ago. Thankfully, there is another way.

Make your own.

I can hear the collective gasps. I know. It's a bit of a chore, admittedly. But if you are organized and committed, you can produce pounds of high quality, nutritional noodles with 0 carbon footprint, that will provide your family with many, many meals.

Step one: Clean.

Yes yes: they never clean on the Food Network. Remember- Food Network is a wealthy behemoth with countless eager minions behind the scenes scrubbing and sanitizing. Even if you don't see the cleaning, you can be sure it is happening. Making pasta will put you -and the pasta- into close contact with nearly every horizontal surface in your kitchen, so unless you want dog hair and dead fruit flies in your dinner, wipe down and scrub everything.

Step two: Make friends with your pasta machine.

This dial controls roller widths
Manual pasta machines are like paper clips. 95% of them are all metal and are all the same. Manual pasta machines are available in virtually every home-goods stores and run around $40.00. They clamp onto your countertop and the rollers are operated with a detachable hand crank. There are two rollers that move away from each other, and are controlled with a dial on the side of the machine. Pasta is
rolled in the beginning on the widest space between the rollers, and gradually cranked down to the narrowest gap, resulting in thin, delicate noodles.

Step Three: Prepare your kitchen.

Making pasta is much more fun when everything is laid out ahead of time. Set out a sheet pan covered with clean tea towels dusted with flour along with  a container of "bench flour" for dusting worktops. Also, decide how you are going to dry your pasta. My kitchen, which is a refugee from 1934, has very little countertop space. So I choose to hang my pasta to dry it. I have a wooden drying rack in my shed where I dry everything from pantyhose to garlic. If you don't have a drying rack, you can use clothing hangers hung from doortops, backs of chairs, or edges of tables. Those with abundant counter real estate can pile their noodles into loose piles, or "nests", a handful of pasta in each nest. Just lay clean tea towels dusted with flour onto your work surfaces and drop your nests there to dry. Unless you live in the desert, you'll need to allow 24 hours to dry any pasta thoroughly.

Step Four: Clear your schedule.

To enjoy the process of making your own delicious pasta, try to carve out at least 3 hours to complete the job. I find that when I am distracted and pulled away frequently, I just end up fractured and annoyed. Making your own quality food is your right. Own it. Give it the time it needs.

Step Five: Make your dough.

Several years ago, I read an article about a far northern Italian village. The residents of this Alpine
hamlet were great pasta makers and all used roughly the same recipe: 1 kilo of flour and 10 eggs. That's it. For those with no kitchen scale, one kilo= 4.3 cups of flour.  (I used 12 eggs because they were from my sister-in-law's little Banty hens, who produce tiny little eggs.)  Mix the flour and eggs together and knead into a ball of dough. Most traditional pasta methods call for the maker to dump the flour on the table, hollow out a well in the center of the pile and pour the eggs in. Working from the outside, pull in gradually increasing amounts of flour until a sticky wad of egg and flour is produced. Knead this wad until it "comes together" and is smooth and homogenous. I, however (as many of you know) am a rebel. I like to do things my own way. So I make the dough in my 5 quart Kitchen Aid mixer using my dough hook. Once the dough is initially formed, you must finish kneading by hand or you will burn out your motor; the dough is very dense!
One small note: it is very helpful to invest in a small kitchen digital scale. One that has at least a 7 pound capacity will run you between $30.00-$80.00. Once you start to do more home cooking and baking, you will find more recipes written in scaled amounts. It's more accurate and when you adjust to the method, it's much, much easier!

Wrap the resulting ball in plastic and refrigerate for at least 30 minutes. Use the dough within a day or two. If you let it rest for too long it will turn an unpleasant shade of green. (Still safe to eat, but not as delightfully yellow)


Step Six: Roll the dough.

Remove the dough from the fridge and whack off a piece. Dust it with flour and pat it down as thin as you can, about 3/8", so the rollers have something to grab onto. Roll it several times through the largest setting, folding the dough once or twice. The dough will become smooth and elastic. Run the dough through
each setting until you get to the thinnest setting. Lay it out on your prepared tray and dust it lightly with flour. Repeat these steps until you have either worked your way through the dough, or have made as much pasta as you like.

Fold over every so often


Step Seven: Cut the pasta.

Allow the sheets of rolled dough to dry for 10 minutes or so, until they feel like fruit leather. Roll the ends towards each other. Slice the roll across in the widths you desire. I made Tagliatelle today, which
Roll the ends towards each other
is a "fatter" noodle. Don't worry if the edges are ragged or the ends are uneven. Hand-made pasta is a luxury; it's ALL good. You can also use the sheets to make ravioli, or virtually any shape you want.
Once you have cut the noodles, slip a long knife underneath and lift up. The noodles will fall over the knife and you only have to drape them onto their hanging rods.

Slide the knife under the center and lift. The noodles will fall
Step Eight: Dry and store.

This kind of pasta is delicate, so use care removing the dried noodles. Store in whatever clean bags
you have either in your pantry, or freezer. If you break, drop or otherwise shatter your pasta, fear not. Store those bits in a separate container and use them in soups and stews!

Not only does making your own pasta benefit your family's nutrition, it's also cheap! I made at least 4 meals worth of noodles for .50 worth of flour, and the eggs were free. So that's less than .15 per meal for the starch portion of your menu. That's pennies per serving.

Personally, I think it's worth the time and effort. Involve the kids or your friends. Open some wine and cook some of the pasta fresh along with some grilled chicken and seasonal veggies. Make a party of it and celebrate your new skills!


Tuesday, July 16, 2013

BakingLove: Gluten free chocolate cake


Before yesterday, all I knew about buckwheat is that beekeepers like to site their hives next to buckwheat fields so their bees can produce the dark, molasses-like honey that comes from the buckwheat flower.
The name Buckwheat is in itself a little misleading. Buckwheat is not at all related to wheat and is in no way even a grass. The plant is more closely related to rhubarb and sorrel, and is cultivated for it's seeds, which can be milled into flour. Buckwheat is high in magnesium, copper and zinc, which is great for the immune system, and is also a good choice for those with diabetes as it seems to slow the rate at which glucose is absorbed into our systems.
Buckwheat plant
Because Buckwheat is not a grass, the seed or kernel does not contain the gluten protein that some people are allergic to, so I thought I would try it in one of my favorite baked treats: chocolate cake. The recipe on the bag of Buckwheat flour uses peanut butter, but since many folks have nut allergies (and I didn't have any in my cupboard), I scrounged around and came upon a lone can of pumpkin- left over from Thanksgiving- huddling in the corner of my vintage cabinet. Perfect. Pumpkin is full of nutrition and fiber and works well as a fat substitute in baked goods. Here is the recipe I ended up with:

Winter'Rest Farm Gluten Free Chocolate Cake

1 15- 16 ounce can pumpkin puree
2 cups unsweetened applesauce
2 cups sugar (I used white, but brown would also be fine)
2 tsp pure vanilla extract
6 whole eggs
2 tsp baking powder
1 cup cocoa powder
1 cup Buckwheat flour
1 cup semi-sweet chocolate chips

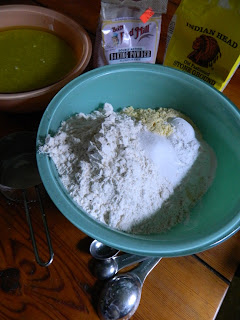
Mix the first 4 ingredients and blend well. Add the baking powder, cocoa powder and Buckwheat flour (be careful here, the cocoa and the Buckwheat flour are very powdery, so you may want to cover your mixer for the first few seconds of mixing). Add the chocolate chips and finish mixing, scraping down the sides of the mixer. Pour into an 8" cake pan that has been prepared with pan spray. Bake at 325 for 60 minutes or until a skewer inserted comes out clean. This batter does not rise very much.

I frosted this cake with vanilla buttercream (also gluten-free, obviously):

1   2 pound  bag of 10X sugar
4 oz. salted butter
2 tsp pure vanilla extract
1/2 cup whole milk

Beat the butter til soft. Add the powdered sugar and vanilla. Mix til crumbly, then add the milk. If the buttercream is too stiff, add more milk in small increments. Continue to beat for an additional 5-7 minutes til the buttercream is pale in color.

Try playing around with buckwheat and see what you can do with this very interesting and healthy food product. Substitute all-purpose flour with Buckwheat flour and see what happens! Have fun!

Friday, June 21, 2013

DinnerLove: Fish Hash


 hum·ble

(Huhm-buh-l) adjective, hum·bler, hum·blest, verb, hum·bled, hum·bling. adjective
1.  not proud or arrogant; modest: to be humble although successful.


Humble is a great word. It rhymes with such charmers as bumble, stumble and crumble. Perhaps it's definition is what makes it such a standout. In a world where elementary school children sport "bling" and carry expensive cell phones, Humble has been forgotten in the pile of elderly and obsolete phraseology. People seldom behave in a Humble manner these days. Shocking conduct is routinely splashed across the gossip rags that line grocery store shelves. 

Humble is without a doubt out of fashion.

I, however, see Humble as a reliable partner. Combined with Strength and Confidence, Humble provides a catalyst that can lead to the path of success. As an amateur Historian, I believe that the Victorians used this Humble formula in the most efficient and effective manner.  Buoyed by scientific breakthroughs and astronomical economical accomplishment, Victorians thrilled to new ideas like Spiritualism,bicycling, day trips and ice cream. Through this modernity, however, the rigorous and unyielding class system remained intact, but servants weren't the only members of society who lived a Humble life. Even the most powerful industry chiefs managed to stay Humble while still flashing outlandish displays of wealth and prestige, perhaps knowing that everything in life is vulnerable and can be swept away in mere minutes.

Victorian cooks embraced Humble. Serving a magnificent roast for Sunday dinner, they continued to use the meat throughout the week, transforming the large cut into salad, hash and soup. The next Sunday, they'd start all over again. A wonderful television series was made in the 1980's that walks  modern folks through the daily life of a Victorian kitchen. This series is a wonderful experiment caught on film and will make anyone grateful for even the most annoying, antique or ragged 20th century kitchen:

http://beekman1802.com/recipes/the-victorian-kitchen-tv-series/


Farming is a Humble occupation. Some might take offense with that idea, seeing Humble as a degradation or insult. Really, though, many occupations could be described as Humble or certainly Humbling. Farming is a little different. Daily, Farmers are hand-in-hand with dirt, manure, after-birth and innards. Each day can bring the joy and heartbreak that is firmly tied to the whims of nature and the wisdom of choices. 

Today, my tomatoes made me Humble. They stand bravely in the windy field, silently accusing me of planting them too early in this northern region. The empty row of green beans that were lovingly planted, but never germinated seems to stare reproachfully at me, accusing me of perhaps planting them too deeply. The bolting onions wave at me; unwelcome blossoms Humbling me. I had no power over the mercurial hot-to-cold weather that produced the premature flowering, but I still felt responsible.  My basil Humbled me too. Only 4 inches tall and already going to seed. I pinched their tops back, scolding them. 

"You're too little to make seeds", I tell them, wagging my finger at them. " I need a freezer full of pesto for the winter. You have a lot more growing to do. Now get to it!"

I wandered over to the beehive after putting the basil in it's place. I felt instantly better. Our Sweetbees can always be counted on to provide a thrill of success. The now 2-story hive was humming with activity. The previous week's addition of the second story showed heavily honeyed frames and countless healthy bees.

It had been a long day of weeding, mowing and mulching. Our kids had helped with the day's chores and everyone was tired. 

Dinner loomed. It was rare that I didn't look forward to creating meals, but today was one of those days. Driving home sore and sunburned, I racked my brain for nutritious options. There were potatoes in the cellar and two packs of Tilapia fillets in the big, upright freezer. Riding next to me in the passenger seat, my son held the two bolted onions, still covered with dirt. 

Suddenly, it hit me. Hash! Fish Hash!

Hash is just a medley of ingredients thrown in a pan and stir-fried. It's a great choice when there is not enough of each separate item to serve them alone. The leftovers -if there are any- are even better.

Winter'Rest Farm Fish Hash

5-6 white potatoes, boiled and cubed

4-5 Tilapia fillets
2 green onions, sliced.
Evoo and butter
Salt and pepper

Heat a large skillet. Melt the butter and evoo. Today, I used 3 TBSP of butter and a 1/4 cup of evoo. The evoo helps the butter reach a hotter temperature without burning, and the butter is a key part of the final flavor.
Toss the potatoes in and brown them on medium/low. Remove. Add the fish and brown. Don't worry if it flakes and breaks. That's what you want. Add the bottom of the green onion and continue to cook. Add back the potatoes and toss. Sprinkle with the green tops of the onions and serve. Delicious.


Hopefully, in the very near future, I will be able to use our black bass to make this meal. In the meantime, I will use what I have to produce a hearty, filling, and tasty meal for my family. 

Humble comes in all packages. Fish hash is only one, but it will satisfy your spirit and fortify you for the coming day- and Humble will help you through.


Wednesday, June 19, 2013

Breaking wrenches


There are days when I find myself bemused by the wicked sense of humor the Universe can show me from time to time.

"Hey!" It bellows from the heavens, lobbing It's celestial curve-ball at me, "catch THIS!"

"This" turns out to be shaped like a wrench. With a monkey attached.

Stretching out, I grasp for the unexpected missile. On this day, I manage to catch the end of it as it sails past my head. I grapple and juggle with the monkey-wrench as I try to gain a purchase on the stinker. Finally it comes to rest in my hands. I look at it with disgust.

Sigh.

Farming is a daily hopscotch of ups and downs, punctuated with some slippery sideways maneuvers. And we're just getting started. Our livestock are fish and honeybees. There's only so much trouble they can get into. There are no large animals to be up all night with while we wrestle with mastitis or colic or complicated, messy births. We have no house on the farm, nor is there any electricity to run the invisible home. The only running water is that which continually flows down the hill following the incessant spring rainfall.

At times I feel like such a newbie that it is painful. The monkey-wrenches pile up in the proverbial corner, having been vanquished and neutralized. I wonder if there is a monkey-wrench limit in the Transcendental General Assembly's Rules and Regulations.

There are lots of cliches written about this phenomenon: "life isn't fair" or "when the going gets tough, the tough get going" or "that's the way the cookie crumbles". That last one is my favorite. I mean, what kind of cookie are we talking about? It's got to be some kind of shortbread or it wouldn't crumble unless it was stale.

I suppose that stale cookie is the most powerful ammunition against succumbing to the potency of the monkey-wrench. The stale cookie does crumble. But the world continues to turn. Children are born, cakes are baked, dreams are realized.

I look at the loathsome monkey-wrench in my hands, then down at the pile of cookie crumbs at my feet. I close my eyes and reach into the depths of my soul, calling upon the vitality that lives there. I ask that spirit to help me transform the monkey-wrench into something more manageable...like a stale cookie.

I lift the monkey-wrench high above my head and fling it to the ground with all my strength.

It shatters to bits, shards breaking off to skitter away. I sweep them into the pile of broken wrenches already littering my proverbial corner. Worry and anxiety roll off me having just been cheated. I dust off my hands and place them on my hips, looking skyward.

"Thanks for that, Great Spirit." I say with another sigh. "That was just you reminding me that everything has a purpose and any obstacle is surmountable...especially with faith and a sense of humor."

Right?


Tuesday, June 18, 2013

DinnerLove: Meatless Meal!


I've been eating a lot of meat lately.

I blame it on the weather. Although it's mid-June, the days have been cool, cloudy and rainy. I'm certainly not complaining; that sort of summer weather is one reason I moved to upstate NY. This kind of proper Irish weather begs for steamy bowls of chili, stew and dumplings.

I needed a change. At least temporarily. Grabbing my reusable shopping bags, I headed to the market.

I perused the grocery store shelves looking for the bargains. Back in culinary school, we had tests called "mystery basket", where we would be given a box of cobbled together ingredients and be expected to create a delicious meal from them- using additional ingredients from a typically stocked pantry.

As I pushed my cart down the isle, scanning the shelves for the bright yellow tags that shouted a drop in price, I mentally thumbed through my recipes and tricks. The pickings were a little slim on this day. I managed to score on some chicken, pasta, pomegranates and a bag of yellow eye beans. The chicken and pasta didn't inspire me, so I stashed them away when I unpacked my shopping bags later that morning. Pomegranates are wonderful in all kinds of ways; delicious as well as heart-healthy and cancer-fighting. So I removed the seeds from the fruit and stowed them in a zip-lock bag for future convenient access. Then I turned to the bag of beans, still slouched against the sugar bowl where it had come to rest when it fell out of my canvas grocery bag.

Yellow eye beans. Hhhmm. I'd never run across them before. They were sleek and sizable. Bigger than a navy bean, but smaller than a kidney bean, they were creamy white with a saddle of dark tan stretched across the top. Sort of the pinto pony of the bean world.

Well, they were new to me, but they were beans- and I certainly knew what to do with beans. A satisfactory meal idea solidified in my mind...an old standby: beans and cornbread. Too much meat in the previous days had left me weary of animal protein and I was ready for a meatless meal. It's long been known that beans and rice combine to make a meat-free complete protein, but cornbread works too. (http://www.ironaddicts.com/forums/showthread.php?t=3848)


I dumped the beans into a bowl and filled it with hot-from-the-tap water. I set the bowl aside. Dried beans really need 24 peaceful hours to rehydrate. Not great for those who crave instant gratification, but still quite doable.

The next morning I peered into the big stainless steel bowl to find the beans had swollen to the top of the water line. I set a big stock pot on the stove and dumped the beans into it. I added an onion, some garlic and a celery stalk, set the heat on low and covered the pot. Don't salt beans until you serve them as it tends to dull their color as well as toughen the skins. Dried beans are an all-day cook, which makes them a great food item for cool, rainy days.

The pot bubbled away cheerfully as I went about my day. Evening approached and I reached behind the stove to get my big cast iron skillet  off it's hook. I turned the oven to 400 degrees and put the empty, clean skillet inside.

Cast iron has great heat retention. Whether it's bare cast iron or cast enamel, these great cooking vessels can withstand even the most inhospitable of temperatures and conditions. They can crack or break if they are dropped sharply on a hard surface, however and do leave black skid-marks on the bottom of your white sink, but other than that, they are dependable cookware, often being passed from generation to generation. In fact,during Reconstruction times in the Old South, cooking in cast iron was one way the survivors of the Civil War were able to get some scant amount of iron into their diets.

For cornbread with a crisp, flavorful crust, cast iron is a great choice. Cornbread is a quick bread and must be mixed quickly and baked immediately. I use a basic cornbread recipe and multiply it to fill my colossal pan. There are two schools of thought in the cornbread cosmos. There are those who like sweet cornbread and some who prefer normal cornbread. In the normal cosmos, sugar does not enter the orbit of the cornbread batter. Of course, if you like to bake your cornbread in a cupcake liner and frost it with vanilla buttercream, by all means, add sugar to your cornbread recipe.

Winter'Rest Farm Cornbread
1 cup white or yellow cornmeal
1 cup all purpose flour
1 1/2 TBSP baking powder
1 tsp salt
1 stick butter melted OR 1/4 cup olive oil
1 cup milk
1 egg

Heat your oven to 400 and put cast iron inside to heat up. To the empty cast iron pan, add a couple of tablespoons of butter to melt and get hot. (If you don't have a cast iron pan, use what you have, add the batter and then bake) Combine the dry ingredients and whisk to incorporate. Set aside. In a separate bowl, combine the wet ingredients and stir together. (I use a whisk) Add your wet ingredients to the dry ingredients and stir to just incorporate. Don't overmix. Less is more here. Remove your hot skillet from the oven and pour in the batter. (Adding the butter or oil to the pan as it heats means that the batter starts frying as soon as it hits the pan.) Move quickly and get it back into the oven. Bake for 25-30 minutes or until golden brown and firm to the touch.
The batter fries as it hits the hot oil in the pan.

I like to serve cornbread within 10 minutes of removing it from the oven. You'll need to wait at least 10 minutes or it will crumble when you try to cut it. If you wait too long, the delicious local butter you slather on it won't melt properly.

To your big wedge of cornbread, add a bowl of salted beans. When I am feeling coltish, I break off hunks of cornbread and stir them into the beans. On a really crazy day, I might add a sprinkle of shredded cheddar. Yum.

This type of dish is a super way to feed a lot of people for mere pennies. The beans cost $1.49 for a 1 pound bag, and the corn meal was .99 for a 2 pound bag. Unless you are serving a platoon of soldiers, you should have plenty of leftovers and you'll please all the vegetarians in your life!

No need to wait for rain...serve anytime and enjoy!


Friday, June 14, 2013

The Pursuit of Contentment


I raised my vintage roller blinds to a bright and brilliant morning. The air was dry and fluffy clouds scuttled across the clear blue sky. It was so uplifting that I barely noted the peeling wallpaper and the crack in the antique window glass.

I was glad to see the dry weather. The day before, strong storms had swept through communities from Massachusetts to South Carolina. In our valley, rain had fallen steadily all day, swelling creeks and rivers to the flood stage. My friends and family in North Carolina sustained significant damage along with widespread power outages. It was Mother Nature in an irascible and grumpy state.

I clumped down the creaky wooden stairs to the kitchen and poured a cup of coffee. The dogs greeted me with wildly wagging tails, silently asking to be let out. I walked with them to the rear of the yard and looked at the beautiful meadow that spreads out to back our property. I took a deep breath, listening to the birds sing in the trees. What a lovely day!

I started to prepare the dog's breakfast, quickly realizing that there was not enough food in the bin -better make a run to the store. I quietly grabbed my keys and crept out of the house; the children were still asleep and it was early.
Getting in my car, I rolled the window down and felt the cool breeze blow across my forehead. The sun was bright; I dug out my sunglasses and put them on.  I glanced to my left and was amazed to see that the West Canada Creek was rolling heavily through it's banks and sent a thankful prayer that none of the creek's residents had seen any flooding with the previous day's storms.

The highway was busy, log trucks and big shiny milk trucks rumbling along the highway as they made their rounds. I turned off the main road and took a short-cut through the rolling farmland that blanketed the valley floor. Green pastures were surrounded by fluffy hedgerows and row after row of spruce and other evergreen trees formed multi-hued green borders against the fields. Meadow grasses waved in the wind, undulating like waves in the ocean. Cows and horses grazed together, some laying peacefully- the tops of their heads the only partially visible through the vegetation. I pulled up to the one and only stop sign on my route and paused to look around. Fluffy balls of color decorated round peony bushes which grew next to spiky lupine flowers. Clumps of wildflowers studded the pastures and edged the heavily flowing creeks and streams. The trees near the stop sign cast cool shadows on the warm pavement, their branches murmuring and whispering as the wind blew through them. Tender new leaves fluttered to the ground, unable to withstand the torment of even the most gentle breeze.

I turned right and continued on my way. As I topped a low rise, on a narrow road with no painted lines, I met a young Amish boy at the reigns of dark carriage horse which was pulling an open buckboard wagon. I slowed down and waved. The boy cheerfully returned my wave, his straw hat pulled low on his head against the stiff breeze. He was leaning casually back on the bench seat, one arm draped across the back. The boy held one of the reins loosely in his free hand, the other long leather reign lay unattended at his feet. He was in no hurry and seemed to be at peace with the world.

I finished my errand and returned to Appleside Cottage. The front garden shimmered with new growth and looked refreshed. I was thankful for the wisdom of nature. Nature has it's own agenda. It's up to us to work around its whims and temper tantrums. If it were left up to humans, it might never storm again, which would have a slew of it's own repercussions.


The dogs settled down, bellies full. The house was quiet. I sat on the back porch in my big rocker and cradled my hot coffee in my cold hands. The wind blew. Birds warbled and trilled, flitting and dancing through the trees. I took a breath of clean, fresh air. Smelled the scent of nearby plants. I rocked.


A sense of happiness and satisfaction washed over me. Then I realized that "happy" may not accurately describe the feeling. Happiness seemed too fleeting, too intangible. This feeling was strong and  marbled with gratitude and independence.

It was contentment.

And it was good.


Thursday, June 13, 2013

DinnerLove: Osso Buco (Vegetarians, avert your eyes!)


I popped into my neighbor's house yesterday to relieve the boredom of a chilly, constantly raining day. She was making venison stew. We chatted and carried on for a time and as I was leaving, she tossed a large plastic bag at me.
"Here." She said. "You take these. I have no idea what to do with them." She made a comical gag-face.
Intrigued, I peered into the bag. Sliced beef shank bones.
"Oh NICE!" I exclaimed. "Thanks!"
"That's part of the cow I got for painting the inside of my friend Sally's house," she explained. "Well, it was only half a cow, really."
"Just half a cow?" I giggled.
"Yes, but it was part of their organic herd. Local and grass fed!"
"...and free for me!" I was delighted to take this wobbling bag of clear vacuum-packed shanks. Seven big, thick disks of beautiful beef rested at the bottom of the white plastic bag, looking back at me and asking what I was going to do with them. My brain started to smoke.
"Ok thanks so much!" I waved at my neighbor as I bounced down her porch steps. "See you later!"
"Wait!" She stopped me. "What are you going to do with those things? She made the comical gag-face again.
"Osso buco!" Came my reply as I skipped back to my cottage.

Osso buco finds it's roots in the northern Italian city of Milan. The classic recipe uses veal shanks, white wine and tomato, and is topped with a gremolata- a condiment made from lemon zest, garlic and parsley. That would have been delicious, if I had had any of those ingredients in my kitchen. But "osso buco" simply means "bone with a hole". These shanks were not veal, and I did have garlic, a bag of onions and a big box of Cabernet Sauvignon. I also unearthed a half a bag of corn meal. Perfect. I would run with that.

I went down to the cellar and dug around for my gigantic use-only-at-Thanksgiving pot. I set the pot on the stove and turned the eye on medium, mildly vexed that one end of the pot wanted to hang off the end of my glass-top stove.
I washed the meat and patted it dry. The dry meat browned well and left a nice, even brown crust on the bottom of the pot. Known as "fond" this dark residue is the caramelization of sugars present in the food that is browning. Fond is a key contributor to a richly flavored dish.
I removed the meat and tossed in my chopped onions. They sizzled and popped as they slowly became clear with nice, even brown edges. I returned the shanks to the pot. Reaching up to the top of the fridge, I grabbed my box of red wine, held it over the cooking meat and turned on the spigot. I let the wine barely cover the meat and topped it off with a quart of tap water. I smashed 6 or 8 cloves of garlic and tossed them in. Salt and pepper finished off the hodgepodge. I set the lid on top and turned the heat down to low.

The chilly, rainy day droned on. Darkness closed in and I returned to the pot that was bubbling away on the stove. Steam billowed up as I lifted the lid to see that my version of osso buco was ready to eat. I knew it was time to make the polenta to go with it.

Polenta is a gruel made from cooking a grain with boiling water. In recent years, it has come to mean cooking cornmeal in boiling water. It can be eaten immediately as a soft, flavorful porridge, or cooled, sliced and fried. It could not be easier to make and is an economical way to feed a large crowd. Just bring the water to a boil and sprinkle in the cornmeal, whisking as you pour. Use 3 cups of water to 1 cup of meal. Today I used 6 cups of moderately salted water to cook 2 cups of cornmeal.
I stirred in butter, lots of salt and a little pepper.

Osso buco and polenta are part of the darlings of the modern food scene. Trendy, urban restaurants charge big dollars for this kind of food. Ironically, many members of this group of current favorites are the descendants of dishes that were born from poverty and necessity. That is the beauty of food. The most humble bit of edible leftover bits can be transformed into a rich, flavorful and satisfying meal for all of those you love.

Try it. You'll be surprised what you'll be capable of!


Wednesday, June 12, 2013

DinnerLove: Farmer Approved Beef Stew


When my husband Jeff and I were engaged, I thought I would surprise him one cool fall day with a rich Irish beef stew for dinner. I crafted this dish with care, chopping my potatoes, carrots and onions neatly and holding back the green peas until the last minute so they would retain their beautiful green color.
I made bread bowls to serve the stew in and set a rustic autumnal tablescape. When he arrived home from work, he surveyed the table with interest, smiling and making sweet comments. Then he looked closer.
"Is that stew?"  He asked, turning to look at me.
"Yes!" I grinned, waiting with anticipation for the approval and admiration.
"I hate stew". He replied, kissing me on my forehead.

The smile vanished instantly from my face.

"Gosh," I said, "I'm not sure I can marry you."

Of course, I was just joking. But that kind of irreconcilable difference worried me. Stew is a fundamental building block of my culinary arsenal. Fortunately, Jeff's beef stew prejudice stemmed from traumatic childhood incidents involving some improperly prepared versions of the dish. He was willing to try to be objective.

Twelve years later, I still haven't been able to win him over to the Dark Side. He continues to shun beef stew, although the rest of the family loves it. What he doesn't understand is that although different names are applied, he eats stew all the time. Chicken pot pie, beef bourguignon, beef stroganoff, carnitas, ratatouille, cassoulet, and even a family favorite- chili, are all stews. The contrasts are cultural and methodical, and of course they all feature different ingredients. But one-pot cooking can be traced back to ancient times and simply refers to food being cooked in a pot with water (or any kind of liquid) and served in it's own sauce. I happen to love Irish Stew, which incorporates common ingredients found on the Emerald Isle. Traditionally, Irish Stew uses lamb or mutton, carrots, onions, green peas and of course, the ubiquitous potato. In my geographical location, lamb is rarely available, tends to be expensive, and frankly, I wouldn't unleash mutton on my worst enemy. So I tend to fall back on the American favorite, beef.

I cut my own stew meat. Buying pre-cut stew meat may be a time-saver for extremely busy people, but unless you are a captain of Wall Street industry, or are preparing to pilot the space shuttle, it is more efficient and cheaper to buy a large cut of meat and cube it down to your desired size. This kind of simple butchery usually takes me about 6 minutes and saves money.

Winter'rest Farmer Approved Beef Stew

1 London broil, cut into 1" cubes
2 medium onions, diced
2 stalks celery, sliced
2 quarts home-made or high quality meat stock-I used chicken
2-3 carrots sliced
2 cups corn
2-3 handfuls green beans, peas, lima beans- whatever you have
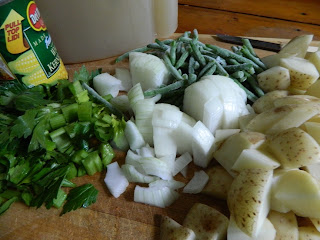
4-5 potatoes cubed
 1 can or bottle of your favorite beer

Heat a thin layer of evoo in the bottom of a large pot.
Dust the meat with all-purpose flour. Layer in the meat so that each piece of meat is separate from it's neighbor. Don't crowd the pot. Brown
the meat on low-medium until they are brown and release on their own from the bottom of the pot. Remove and do another batch. Remove. Add the onions and celery and brown. Deglaze with the beer or the stock. Fill the pot with all ingredients, cover and cook on low for 4-8 hours.

I love to serve this kind of stew with my home-made bread...any kind will do! This is wholesome, hearty fare. Your family should love it and you should have plenty of leftovers to fall back on later in the week when you may not have time to prepare a meal from scratch.


"Líon isteach do bholg agus do spiorad le úr, bia ar fad!"

"Fill your stomach and your spirit with fresh, whole food!" Translated from the Irish language.

Slainte and Cheers!

Tuesday, June 11, 2013

The Thrill of the Grill!


I like to use firewood. What's in those briquettes anyway?


Since the dawn of time, humans have cooked meat over fire.

Many still do. In modern times we call it "grilling" or "barbequing".
We flock to the hardware store to gaze upon the newest, shiniest grills- especially those with multiple functions; the flashy models with side burners and rotisserie spits all housed in pristine stainless steel bodies. Many of these cookers sport optional accessories in nearby display racks: infrared remote thermometers, digital probe heat sensors, special pans and baskets to grill fish, vegetables and fruit. Next to the 12 inch aim-and-flame lighters are stainless steel suitcases holding 14 and 20 piece deluxe grill tool sets that fill the shelves just down from the all-weather fitted grill-covers with velcro tabs for extra security. There are bags and bags of charcoal; from the basic black briquette and traditional cubes of charcoal studded with "all-natural" wood,  to small-batch boutique lumps of charred mesquite, hickory or apple wood.

All that to cook food over fire.

If you filter and dig, tossing aside the glitzy tools and ornaments, you find that all you need is a heat source and something to hold the food. The exploring Spanish of the 15th century found the Arawak people of the West Indies cooking fish and other meats around a fire on wooden apparatus that they called "barbacoa". The word has come down through history to the modern term we recognize as Barbeque, or even Bar-B-Q.

Many people confuse "grilling" with "barbequing". Really, the difference is simple. Grilling is a quick cook, almost the open-fire version of a saute. Barbequing is a long, slow cooking method which renders the food item soft and tender with deep, complex flavors that incorporate the natural flavor of the food with the flavor generated from the heat source.

Most fish, vegetables or fruit can't stand up to the long cooking methods involved in barbequing. Pork, beef and chicken are the common choices for barbeques. Some pit-masters opt for dry "rubs" which are made up of multiple spices and salt, mixed together and rubbed over the meat, to create a flavorful crust as the meat cooks over split firewood. Some choose a "wet" style sauce (that can be made from literally anything, but usually has a tomato base) and use gas as a heat source.  Or vice versa. There are very serious national and international competitions that seek to find the best way to barbeque. Books are written, sides chosen and awards bestowed on whoever creates the best, most tender, most flavorful dish that is wrought through a day-long sojourn on what is usually a hand-made, thoughtfully engineered, often creatively painted and finished barbeque rig.

But still, it all boils down to humans cooking food over fire.

Personally, I like both dry rubs and wet sauces. I use whatever ingredients I have on hand, usually opting for fresh herb sauces in the growing season, and dry spice rubs and sauces in the winter. As many people know, there are countless bottled barbeque sauces and rubs available in the marketplace. Most are relatively expensive for the small sized containers. They also tend to be cloyingly sweet and sticky with ingredients that I don't want my family to ingest. I make my own and always have extra to store.

Winter'rest Farm Honey-Bacon Barbeque Sauce

1 28 oz. can of crushed tomatoes or sauce
1/3 c. bacon grease
1/3 c. local honey
1/4 c. paprika
1/2 c. organic apple cider vinegar (its worth it)
1/4 c. cumin
1/3 c. chili powder
2 TBSP kosher salt
1/4 c. black pepper
1/4 c. sugar (brown is best, but whatever you have)
1 large onion diced small
1 TBSP cinnamon
Pepper flakes to taste

Combine all ingredients in a heavy bottom sauce pot.  Bring to a boil. (Watch this, boiling tomato sauces will spit fire) Cover and reduce to low. Cook, stirring occasionally until the sauce has reduced to the desired thickness. Cool and bottle.

The fun of barbeque sauce is that you can use whatever you like. Keep things like bacon grease or stocks from weekly cooking to add to your sauce. Use the bottom-scrapings of jams and jellies that are languishing in your fridge door- just heat them slightly to liquify and pour into the pot. Anything with the flavor profiles that you like can be added. The hardest thing you'll have to do is run your sauce through a strainer before bottling.

Refrigerate your house-made sauce for future uses. If you are a capable canner, by all means, can your barbeque sauce and store it in your pantry!