Monday, June 3, 2013

SnackLove: Whole Wheat Cocoa Brownies!


It was a cold morning. I had nothing planned. The house was clean, the garden was planted and mulched. Laundry had been folded an put away. The big yellow bus had swept the kids off to school.

The dogs were snoring in their beds.

With our new, simpler lifestyle, we had forgone the satellite dish and cable service in favor of other more important things- like farm infrastructure, not to mention paint, wallboard, lumber, nails, wire, plumbing and scads of nuts, bolts, gaskets, fittings and tape- all to bring Appleside Cottage back to her formal glory.

There was just no extra money for 600 of America's favorite channels.

That cold morning, the 2 channels our antennae picked up were not offering anything more insightful than the latest Hollywood fluff or what insipid shade of eyeshadow everyone-who-was-anyone would be buying and wearing for the upcoming season. So, as often happens, my attention was drawn to the kitchen.

Since it was a chilly morning, my thoughts went automatically to baking. As I perused my pantry to see what the pickings were, I was disappointed. Unless I wanted to make a sweet whole wheat omelet filled with walnuts and shredded coconut, I was out of luck. Then suddenly, out of the corner of my eye I spotted the glint of white in the letter "H" that formed the word Hershey's! COCOA!

Even with the momentary thrill of finding a brand-new can of cocoa powder, I was chagrined; my dry-goods shelf was pretty bare. It took about 4 seconds to take inventory: a half a bag of 10X sugar, 2 empty bread bags I was saving to store my home-made bread in, a comfortingly full bag of walnuts, a container of self-rising flour (nearly useless unless you are making biscuits every day), 1 scant cup of all-purpose flour and sturdy brown bag of King Arthur whole wheat flour.

So I channeled my old pal Pooh-Bear. "Think think think!"

Here is the result:

Winter'rest Farm Whole Wheat Cocoa Brownies

1 stick butter (or 1/2 stick butter, 1/2 cup applesauce)
1 1/2 cup sugar
1 cup cocoa powder
pinch of salt
1 tsp vanilla extract
3 eggs
1/2 cup whole wheat flour
Optional: add-ins like chocolate/butterscotch/peanut butter chips, nuts, or coconut.

Preheat your oven to 325. (With a few exceptions, most baked goods perform better at a lower temperature. So if in doubt, use 325 degrees)Melt the butter, sugar, cocoa powder and salt in a pan on low-medium until combined and smooth.Remove and cool.
Note: it is helpful to put the butter in the pan first, then the sugar, then the cocoa. If you get sugar lumps, bump up the heat, stirring constantly, then turn the burner off and let the pot stay on the eye, using the residual heat to continue to melt down the sugar. If a large lump develops and resists melting, just remove it.
Once the chocolate mixture is cool, add the vanilla and eggs, mix until well incorporated. Add flour and mix. Pour into a pan prepared with pan spray and parchment (or just buttered). Bake for 20 minutes or until a skewer inserted comes out clean.

Now, I won't go so far as to say that these brownies are healthy. But when you have a chance to throw in some element that provides just a bit more nutrition, why not? Just don't tell them it's made with whole grain flour. I doubt anyone will be able to tell!


Friday, May 31, 2013

FoodLove: Rhubarb

Looking at my freshly washed spring rhubarb, it's hard to believe that this humble plant -classified surprisingly as a fruit in America- was once more highly prized than cinnamon and opium when it traveled the Silk Road to 14th century Europe.
For thousands of years, rhubarb could be found to be growing wild on the banks of the River Volga, which flows through central Russia. The plant finally made it's way to America in the 1820's, and began it's popularity along the east coast and spread west from there.

Now that I live in a cooler, more temperate climate, I find that everyone has at least one huge clump of rhubarb in their back yard. Although rhubarb can be grown in almost any region, it grows best in areas with lots of rain and what is called a "chilling requirement"; a certain number of nights in the 40s or below during the growing season. In upstate New York, we plant rhubarb in direct sunlight, and our rainfall is sufficient to render irrigation unnecessary. If one wants to grow rhubarb in hotter climates, it would need to be planted in a shady spot and provided with lots of water.

Many grocery stores carry greenhouse-grown rhubarb, which typically presents a stronger pink or red color to the stalk and can be sweeter and less tart than outdoor-grown rhubarb, which tends to show a much more mild pink and can sometimes even be a simple pale green. The color of the stalk bears no effect on it's culinary suitability - other than a slight difference in the sweetness.

This year, following a marathon spring planting day, I came home to find a bag of rhubarb stalks hanging on my front door knob- a gift from my lovely next-door neighbor. Having lived in the Southeast for close to 30 years, I hadn't had a lot of exposure to rhubarb or it's recipes. The day I snatched that bag of leggy, lolling stalks off my front door, started me on a path of new and exciting culinary possibilities. I started with rhubarb cobbler:

Preheat your oven to 400 convection. (425 non-convect)
1 cup white sugar
6 cups rhubarb, cut to large chunks
3 heaping TBSP cornstarch
splash of water
Mix the sugar and cornstarch together in a large saucepan. Add the rhubarb and toss to coat. Add a splash of water and bring the heat up to medium. Cook for several minutes to develop the starch and slightly cook the rhubarb. Set aside.

1 cup all-purpose flour
1/4 cup white sugar
2 tsp baking powder
pinch of salt
1/2 stick of butter
1/2 cup milk
2 eggs

The cake part of a cobbler is what is known as a "quickbread". Quick breads are mixed using a technique called "wet-dry" mixing.  Combine the dry ingredients and mix. Melt the butter, lightly scramble the eggs and add both to the milk. Mix to combine. This is your "wet" component. Add the wet to the dry ingredients and mix together, but don't overmix.


Remove the rhubarb mixture to a 9x13 pan or other suitable baking dish. Dot the top (if desired) with dabs of butter. Pour the batter over the top and bake at 400 for 25-30 minutes or when the top is golden brown and the fruit is bubbling up from underneath. It's a good idea to bake cobblers with an underpan to catch possible drips.

Finished cobbler. Serve with vanilla ice cream!
Another good recipe using rhubarb is Rhubarb Bread. Much like banana bread or zucchini bread, the batter is heavy and can taste a little like cake. My recipe was invented on a morning when I had 7 young adults (including 4 strapping West Point Cadets) to feed, 4 eggs, one stick of butter, 25 pounds of sugar (to feed to the new bees), a half-empty jar of crystallized honey, and a sink full of rhubarb that I had gotten from the neighbor's giant patch. (with permission, of course). I did have some steak sauce, peanut butter, yellow mustard and a can of Italian Sardines, but I couldn't come up with a passable idea that would appeal at 9 am.

Winter'rest Farm Rhubarb Bread
1 stick of butter
2 scant cups white sugar
1/2 cup local honey
4 small eggs or 3 large/extra-large eggs
1 3/4 cup all purpose flour
2 tsp baking powder
1 cup milk
4 cups chopped rhubarb

Cream the butter for several minutes until pale yellow. While the machine is running, add the sugar slowly. Add the eggs, one at a time. Add the honey and rhubarb and mix. Scrape down the sides of the bowl and mix again. Add the flour and baking powder. Mix on medium for a minute or until just combined. Pour in the milk and mix until incorporated. The key is to not over-mix once you add the flour, which makes the final product tough.

Rhubarb is a wonderful plant that will live for years with little or no maintenance. It's a healthy food, providing anti-oxidants, minerals and lots of B vitamins, including niacin, which helps maintain the body's lipid levels. Once your rhubarb plant gets too big, you can pull it out and split it, as we did here:

This large plant became 7 new ones!
7 new plants from one giant root!
 Grow your own rhubarb and have fun inventing your own new recipes! Remember though: the leaves are toxic, so cut them off and toss them into your compost bin. Enjoy!


Friday, February 22, 2013

DinnerLove: Gnocchi


I have a lot of Irish in me. That must be the reason that if given a choice, I go for potatoes every time. Much like Bubba says in Forest Gump (which yours truly help make, by the way), you've got fried potatoes, mashed potatoes, scalloped potatoes, smashed potatoes, boiled potatoes, oven-baked potatoes, gratin potatoes, twice-baked potatoes, cheese potatoes, and if you want to get fancy: potatoes turnee, potatoes dauphinoise, and pommes Anna.

Potatoes are native to South America. The Spanish explorers brought them back to Europe as part of the New World plunder. Most of the upper class shunned the potato, (as they did the tomato, believing it to be poisonous) relegating it to the masses who were also doubtful. But the easily grown and tasty tuber won them over in short order. In a few short generations, tens of thousands of Old World populations were depending on the potato to fend off starvation. Of course this phenomenon leads to the Irish Great Famine; the catastrophic failure of several seasons of the potato crop- the result of a perfect storm of several components, including soil depletion and a lack of bio-diversity which left the plant fragile and vulnerable.

Fortunately, much was learned from this agricultural disaster and the wonderful potato was brought back from the brink of extinction. A traditionally cool season vegetable, potatoes are now available in varieties that allow the gardener to harvest this terrific tuber all through the growing season. Many people have never experienced the joy of pushing a shovel or fork into the soil and unearthing a nest of potatoes, the damp, dark dirt still clinging to the pale, thin skin. When we buy potatoes at the supermarket, the skins are thick and heavy. But when potatoes first emerge from the ground, the skins are inconsequential; thin and soft and hardly worth the effort to peel. The tuber itself is full of water, so much that it will form a puddle on the board once cut. It's an entirely different creature to it's store-bought cousin!

I like to make gnocchi with potatoes. Eating gnocchi is a heavenly experience. Light and pillowlike, swaddled in sauce and/or cheese, meat or vegetables, gnocchi is simply delicious. The store-bought version is passably good, but expensive, dense and bland. There are lots of recipes for this potato dumpling, but they all boil down to a ratio of 3 main ingredients: cooked potato flesh, flour and eggs. Here is my ratio:

I put the taters right on the rack.   
Equal parts potato and cups of all purpose flour
1/2 that amount of whole egg
Salt and pepper to taste

So today I have 5 russet potatoes. I'll wash them, and put them into a 400 degree oven. Some people boil their potatoes for gnocchi. I like to bake them because it makes for drier potato flesh. I also get a by-product of the skin which makes a delicious snack, rebaked with cheese, chili, and whatever else you like!

 Once I scoop out the cooked flesh, I'll pass it through a ricer (you can also run the potato through a mixer if you don't have a ricer, or mash them by hand. Just don't run it in your food processor or blender) Then I will add 5 cups of flour and 2 extra large eggs or 3 small eggs. (literally 2 1/2 eggs) Then, I mix all this together and let it sit for an hour or two under refrigeration. This last step is optional, but does help.
Ooops. Forgot to put the taters through the ricer...
O well, just put it in the mixer!
In small portions, roll the dough into "snakes". Cut small segments and roll the segments against the back of a fork. The grooves and dimple that result help sauce and toppings adhere to the gnocchi.


Let the gnocchi rest on a floured sheet pan. Drop into boiling water and boil until the dumpling rises to the surface. Remove with a slotted spoon to a waiting bowl. Top with your favorite choices or mix with cheese and bake for a scalloped "casserole" gnocchi.

A simple and wholesome dinner with a little melted butter and salt and pepper...the possibilities are endless!

Tuesday, February 19, 2013

Dinnerlove: Roman Chicken


 I was first married in 1993. I had been raised by a mother with a Bachelor’s Degree in Home Economics, so I was confident that I’d be able to clean, decorate, garden and cook as well as I’d seen my mother do for the previous 26 years.

Nope. 

I could barely keep up with the dust in the rural Victorian farmhouse. I had no talent with decorating or with painting the old walls. I started a kitchen garden and immediately killed my summer squash by spreading the granular fertilizer directly on the leaves of the poor plant, instead of into its soil.  When it came to cooking, I had no idea that marinating chicken in pure lemon juice for 3 days would turn it into plywood, or that starting potatoes in hot water would yield what amounted to wallpaper paste.

I persevered though, being the stubborn girl I am. My mother had watched Julia Child's cooking programs on t.v., and I turned to Public Television to help me learn to be a better homemaker and cook. Twenty years ago, the local PBS station allocated all day Saturday to cooking and DIY shows. It was my habit to tune into every cooking show that aired, in an attempt to pick up some tips. I particularly loved the shows that combined travel and cooking; Burt Wolf and The Frugal Gourmet were my favorites. I ordered the cookbooks that accompanied the shows and worked my way through starters, meat, poultry, vegetables and desserts. One of my favorite poultry dishes was one that had its origins in Roman cooking. I have forgotten the original title of the dish and have come to refer to it as “Roman chicken”. I have adjusted this recipe significantly, to reflect my tastes and it has become one of my family’s favorite dinners.
 

Roman Chicken
8 skinless chicken thighs (chicken thighs are a cheap and wonderfully flavorful product- try to use them bone-in, there is more flavor)
1 yellow onion, peeled, cut to small dice
6-8 large garlic cloves, minced or put through a press
2 tsp Italian spice
2 tsp dry basil (fresh can certainly be used, just remember the fresh is less potent than the dried and adjust accordingly.)
3 tsp/1 TBSP (or more) dried oregano
1-2 tsp dried rosemary
2 Tbsp ground black pepper
1-2 bay leaves
1/2 tsp cinnamon
1/4 cup brown sugar (use white granulated sugar if you don't have brown- or add a little molasses to the white sugar)
1 – 1 ½ cup red wine(no substitute here...if you don't want to use real, table quality red, just omit this ingredient; keep in mind alcohol burns off in the cooking process)
½ cup balsamic vinegar
1 small can of tomato paste
4-6 cups tomato sauce, crushed tomatoes or whatever you have on hand
2 cups Spanish green olives (you can also use capers)
Salt to taste 
Steamed rice


Brown the chicken in a skillet with olive oil. Don't move them until they release naturally from the bottom of the pan. Keep the heat at medium and you'll get a nice, even brown. Remove from the pan. Add the diced onion and saute for 5-6 minutes or until the onions are slightly golden. Add the sugar and mix for 2-3 minutes. Pour in the wine and deglaze the pan. Add in all the other ingredients into the pan and stir to incorporate. Replace the chicken thighs into the pot and cover. Simmer for 3-4 hours or until the meat falls off the bone. Serve over brown or white steamed rice, dumplings, pasta or toasted rustic bread.

This dish is even better the next day. You can also do the first part of this recipe and slide it all into a crock pot. Although there are a fair amount of ingredients, most are pantry staples. Enjoy!

Friday, February 15, 2013

Sweetlove: Carrotcake cupcakes with Cream Cheese Buttercream


Cupcakes are all the rage lately. Many are beautiful to look at. Many are delicious to eat. Some have both qualities, most do not.

Including this one.

My Farmer Approved Carrotcake Cupcakes are humble in appearance, but will make your sweet-tooth happy.
These goodies are essentially muffins in make-up; meaning that when you're mixing the batter, you gather together all the dry ingredients, then combine all the wet ingredients...then you add wet and dry together and stir. The secret is not to over mix...it makes for a tough and rubbery cake.

 Preheat oven to 325.

4 cups all purpose flour
1 Tbsp + 1 tsp baking soda
2 tsp baking powder
2 tsp salt
3 tsp cinnamon
1 tsp nutmeg
3 1/2 cups white granulated sugar
2 cups olive oil (not extra virgin. You can use any other kind of neutral oil)
6 eggs
1 Tbsp vanilla
5 cups shredded carrots
2 cups shredded coconut
1 14 oz. can crushed pineapple

Combine dry ingredients, whisk together to mix. Mix together all wet ingredients (I like to do this step in a mixer). Add wet and dry ingredients and mix into a batter. Using a portion or ice cream disher, scoop into cupcake liners and bake for 20 minutes or until a toothpick comes out clean. Cool on rack and frost.


Frosting:
4 oz. (one stick) salted butter
8 oz. cream cheese
2 lb. bag 10x powdered sugar
1/4 milk or cream
2 tsp vanilla

Cream together the butter and cream cheese. Add the sugar, milk and vanilla. Mix on medium for 4-6 minutes or until creamy and white. If the texture is too "loose" add in more sugar 1/4 at a time.  Use a scoop or piping bag to top the cupcakes.


SweetLove: Gluten-free Haystack Cookies


Many people in America and around the world suffer from Celiac Disease. Without going into too much detail, it is a human allergy to the gluten protein contained in many grain products including wheat, barley and rye. Corn products are gluten-free naturally, and can be consumed without concern, unless the cornmeal or other corn product is contaminated during processing in a facility that also processes grains containing gluten.
Celiac Disease is thought to be hereditary and a blood test can be performed to confirm its presence. However, many people who do not have CD, find that reducing the amount of gluten in their diet is helpful. The gluten protein is what provides structure to baked goods, so eliminating flour from desserts can be problematic. There are substitutes that one can make, but most require items such as chickpea flour, xanthan gum and other stabilizers that can be hard to source and expensive to purchase. As a result, Celiacs and those who are gluten intolerant must avoid mainstream desserts and other bakery goodies. Fortunately, there are some options!
This is one dessert that I learned from my dear friend Chef Courtney Leckey. I have, however, made some changes to the recipe and adjusted the quantities and measuring methods for the home cook. There is no gluten and no fat, so it's a nice choice!

Haystack Macaroons
2 cups white granulated sugar
2 tsp pure vanilla extract
6 egg whites
7 cups packed or 2 1/2 14 ounce bags sweetened shredded coconut


This recipe couldn't be easier. Simply put the ingredients into a bowl and mix until combined.
Scoop with desired size portion scoop (ice-cream scoop) and bake at 325 degrees for 15-20 minutes or until lightly brown. These can be dipped in coating chocolate, and are tolerant of light add-ins like chocolate chips, jimmies, nuts and food coloring. Just have fun with them!


Monday, February 4, 2013

A Whole 'Lotta Goodness!


 A little while ago, one of my College friends asked me to help her with some basic food and cooking tips. She has battled cancer and was interested in pursuing a diet that was cleaner and simpler, using whole foods to help her body fight the illness in the most effective way.

Everyone should check with their Primary Care Provider to ensure that any food or lifestyle is safe for them. That said, most people will benefit from filling their pantries and plates with locally sourced, organic-when-possible-and/or-affordable, seasonal produce, meat and dairy. When choosing fruits and vegetables, try to gather a selection of brightly colored options. The more saturated the color, the higher the benefit of the anthocyanins that are contained inside. Anthocyanins belong to a class of molecules called flavonoids which are powerful antioxidants.  For instance, when a sweet potato is cut in half, the bright orange color goes all the way through the tuber.

 Many people have chosen a vegetarian or vegan lifestyle. Vegetarians typically don't eat meat of any kind, but do use dairy (which includes eggs), honey and other animal by-products. Vegans, on the other hand will not use any sort of animal product. Strict Vegans will even avoid yeast and honey. Both Vegetarians and Vegans tend to use soy products as a protein replacement.
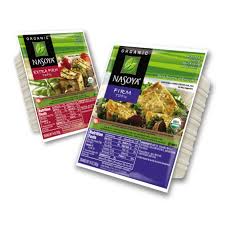
When you want to use Silken Tofu as a protein substitute in baked goods, use ¼ cup tofu for every 1 egg. Put the tofu in a food processor along with a little PLAIN soymilk to loosen, and whiz on high to get it liquid-y.
Some recent research has suggested that soy products can increase hormones which can elevate a woman's risk of cancer. Soy products are wonderful, and completely appropriate in many cases. However, knowledge is power. Talk to your PCP if you're concerned.
To get the most out of extra firm tofu, freeze it over night, then thaw and drain before cutting. Try pressing it overnight in a colander with a weighted plate set on top of it to eliminate extra water. Then the tofu will sear better in a skillet, and provide a more acurate meat-like “mouth feel”.


A wonderful group of plants to plant and cook with are members of the Allium family. These include onions, garlic, leeks and chives. All Allium bulbs and foliage are not only easy to plant, harvest and store, they are downright necessary in the kitchen and provide reliable support for the immune system. Use garlic liberally. It is wonderful for the cardiovascular system and has great immune boosting properties. Don’t be put off by the breath-thing. Good flavor and good health are more important…or chew some mint after. IMPORTANT: to maximize the potency of garlic, chop, mince or slice- then wait 15 minutes before eating. The two chemicals that are beneficial mix together when the flesh of the bulb is cut. It takes 15 minutes for them to reach their most potent point. Try to limit the cooking time. All fruits and veg are most healthy with the least amount of cooking time.

Mine your grocery for shelf-stable items like GROUND flax seeds (don’t bother with flax seeds that are not ground, they simply run through your system with ZERO benefits and they’re costly), chick pea flour and soy flour. Bob’s Red Mill is the BEST!! Look on the internet for 5 pound bags. Local groceries usually only carries one pound bags.
Go to the trouble of making your own granola blend. It’s a fun project to involve the kids in, it’s wonderfully soul-satisfying to eat your own cereal, and YOU control the ingredients that are going into your body! Store in an airtight container on your pantry shelf. Adding things like nuts and dried fruit increase the nutritional content and flavor of your granola blend...Remember that QUALITY dried fruit packs as much a nutritional punch as fresh. The only negative is a slightly higher natural sugar content, but that’s a hair-splitter. Also, dried fruit is shelf-stable, and can be re-hydrated in boiling water poured over it and left to sit for a couple of hours. It’s not an exact approximation of fresh, but still a good choice.


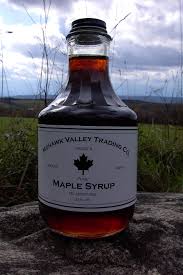
 Stay away from anything processed or artificial. This includes sugars and fats. There are lots of creative choices when in comes to sweeteners. Agave Nectar is America's current darling...think for yourself when considering the expense of Agave Nectar. There is conflicting information about long-term use of this sugar substitute and it has an odd overly-sweet flavor note. Studies show that it contains roughly 1.5x the amount of sugar as compared to cane or beet sugar. In other words a little goes a long way. Go for GRADE B maple syrup (the best to cook and bake with), molasses, sorghum, brown sugar, raw sugar or honey. Check out www.benefits-of-honey.com
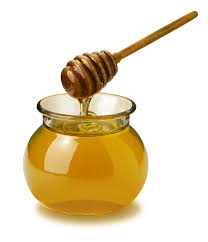
One note on honey. Make sure that it is local or from U.S. farms only! Read the labels carefully. Honey from Asia, South or Central America is not regulated at all. It’s cheaper but can contain dangerous chemicals. Whatever the bee takes to the hive is in the honey.
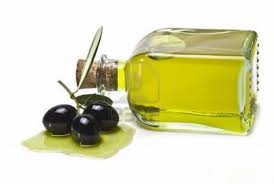
As far as fats go, remember to stick with natural products. Vegetable, nut and seed oils are terrific in dressings, sautes and stir-frys. Olive oil is best for a wide variety of uses, but does have a low smoke point, so is better for cooler cooking techniques. Try to use extra virgin olive oil whenever possible. It’s more expensive, but loaded with Omega-3 fatty acids and flavor! Use canola oil if you want a neutral background flavor. Even butter, especially locally made butter, has wonderful flavor and contributes to nearly any dish. Stay clear of anything that lists Partially-Hydrogenated in it's list of ingredients. Anything partially-hydrogenated is by nature, literally one molecule short of being plastic and can't be efficiently metabolized by the human body.


A whole-food diet is work. There's no way around it. You have to think about what you're putting into your body as well as how best to work with whatever season's offerings you may have at the time. Fresh, local and seasonal meats and produce can also be expensive, adding another component that must be considered. Here are a few tips to help mitigate the effort:

1. Use your Supermarket to help you with some of the work. For example, if you want fresh pineapple, ask the produce manager if there is any fresh cut available. Many markets have “vegetable butchers” on site to help you with this. Buy grains in bulk and store in your own airtight containers. Purchase cheese at the deli section and wrap it yourself; cheese needs to breathe to stay flavorful.

2. Cook meals ahead and store them in the freezer. You are essentially making your own convenience food that will be ready for you when you are ready for it. Convert recipes to make more of each batch.
You can always convert a recipe by this formula: New/old.  For instance, if the yield on a recipe is for 4 portions and you only want one, just divide. If the yield is 3 and you want 10 portions, it is 10/3=3.3, so multiply every ingredient amount by 3.3 and you’ll have the correct quantity for the desired yield. Keep in mind that fractions have to be converted to decimals and then multiplied. Here is a table for fractions to decimals: http://math2.org/math/general/arithmetic/fradec.htm


3. Prep ahead on the weekend or on a quiet evening. Par-cook items ahead so actual cooking time is decreased. Anytime you see the term “Par-cooked, par-boiled, etc” …”par” refers to a light, initial cooking, then cooling and reserving the product for further use.


 4. Contact your county's Ag Extension Office. Ask them for a map of Farmer's Markets. Buy directly from farmers either at Farmer's Markets or from their farm. Be sure to call ahead when visiting farms so someone will be there to help you. CSA (Community Supported Agriculture) programs are also wonderful. For a weekly, monthly or seasonal fee, you get a box of whatever the farm has available all through the growing season. There are produce, meat and dairy CSAs.


 A whole-food lifestyle is a commitment to the health of your body and spirit. Your family and friends will benefit as well. It's not just about eating healthy, real food. It's the pursuit of an understanding of how and where our food grows, is harvested and preserved. It's about appreciating each season and the bounty it offers. A whole-food lifestyle reminds us all that we only have one Earth; the soil of which provides us our health and will sustain us as we sustain it.