Friday, February 15, 2013

Sweetlove: Carrotcake cupcakes with Cream Cheese Buttercream


Cupcakes are all the rage lately. Many are beautiful to look at. Many are delicious to eat. Some have both qualities, most do not.

Including this one.

My Farmer Approved Carrotcake Cupcakes are humble in appearance, but will make your sweet-tooth happy.
These goodies are essentially muffins in make-up; meaning that when you're mixing the batter, you gather together all the dry ingredients, then combine all the wet ingredients...then you add wet and dry together and stir. The secret is not to over mix...it makes for a tough and rubbery cake.

 Preheat oven to 325.

4 cups all purpose flour
1 Tbsp + 1 tsp baking soda
2 tsp baking powder
2 tsp salt
3 tsp cinnamon
1 tsp nutmeg
3 1/2 cups white granulated sugar
2 cups olive oil (not extra virgin. You can use any other kind of neutral oil)
6 eggs
1 Tbsp vanilla
5 cups shredded carrots
2 cups shredded coconut
1 14 oz. can crushed pineapple

Combine dry ingredients, whisk together to mix. Mix together all wet ingredients (I like to do this step in a mixer). Add wet and dry ingredients and mix into a batter. Using a portion or ice cream disher, scoop into cupcake liners and bake for 20 minutes or until a toothpick comes out clean. Cool on rack and frost.


Frosting:
4 oz. (one stick) salted butter
8 oz. cream cheese
2 lb. bag 10x powdered sugar
1/4 milk or cream
2 tsp vanilla

Cream together the butter and cream cheese. Add the sugar, milk and vanilla. Mix on medium for 4-6 minutes or until creamy and white. If the texture is too "loose" add in more sugar 1/4 at a time.  Use a scoop or piping bag to top the cupcakes.


SweetLove: Gluten-free Haystack Cookies


Many people in America and around the world suffer from Celiac Disease. Without going into too much detail, it is a human allergy to the gluten protein contained in many grain products including wheat, barley and rye. Corn products are gluten-free naturally, and can be consumed without concern, unless the cornmeal or other corn product is contaminated during processing in a facility that also processes grains containing gluten.
Celiac Disease is thought to be hereditary and a blood test can be performed to confirm its presence. However, many people who do not have CD, find that reducing the amount of gluten in their diet is helpful. The gluten protein is what provides structure to baked goods, so eliminating flour from desserts can be problematic. There are substitutes that one can make, but most require items such as chickpea flour, xanthan gum and other stabilizers that can be hard to source and expensive to purchase. As a result, Celiacs and those who are gluten intolerant must avoid mainstream desserts and other bakery goodies. Fortunately, there are some options!
This is one dessert that I learned from my dear friend Chef Courtney Leckey. I have, however, made some changes to the recipe and adjusted the quantities and measuring methods for the home cook. There is no gluten and no fat, so it's a nice choice!

Haystack Macaroons
2 cups white granulated sugar
2 tsp pure vanilla extract
6 egg whites
7 cups packed or 2 1/2 14 ounce bags sweetened shredded coconut


This recipe couldn't be easier. Simply put the ingredients into a bowl and mix until combined.
Scoop with desired size portion scoop (ice-cream scoop) and bake at 325 degrees for 15-20 minutes or until lightly brown. These can be dipped in coating chocolate, and are tolerant of light add-ins like chocolate chips, jimmies, nuts and food coloring. Just have fun with them!


Monday, February 4, 2013

A Whole 'Lotta Goodness!


 A little while ago, one of my College friends asked me to help her with some basic food and cooking tips. She has battled cancer and was interested in pursuing a diet that was cleaner and simpler, using whole foods to help her body fight the illness in the most effective way.

Everyone should check with their Primary Care Provider to ensure that any food or lifestyle is safe for them. That said, most people will benefit from filling their pantries and plates with locally sourced, organic-when-possible-and/or-affordable, seasonal produce, meat and dairy. When choosing fruits and vegetables, try to gather a selection of brightly colored options. The more saturated the color, the higher the benefit of the anthocyanins that are contained inside. Anthocyanins belong to a class of molecules called flavonoids which are powerful antioxidants.  For instance, when a sweet potato is cut in half, the bright orange color goes all the way through the tuber.

 Many people have chosen a vegetarian or vegan lifestyle. Vegetarians typically don't eat meat of any kind, but do use dairy (which includes eggs), honey and other animal by-products. Vegans, on the other hand will not use any sort of animal product. Strict Vegans will even avoid yeast and honey. Both Vegetarians and Vegans tend to use soy products as a protein replacement.
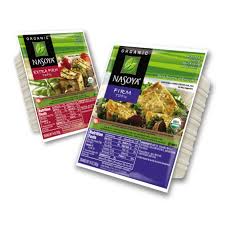
When you want to use Silken Tofu as a protein substitute in baked goods, use ¼ cup tofu for every 1 egg. Put the tofu in a food processor along with a little PLAIN soymilk to loosen, and whiz on high to get it liquid-y.
Some recent research has suggested that soy products can increase hormones which can elevate a woman's risk of cancer. Soy products are wonderful, and completely appropriate in many cases. However, knowledge is power. Talk to your PCP if you're concerned.
To get the most out of extra firm tofu, freeze it over night, then thaw and drain before cutting. Try pressing it overnight in a colander with a weighted plate set on top of it to eliminate extra water. Then the tofu will sear better in a skillet, and provide a more acurate meat-like “mouth feel”.


A wonderful group of plants to plant and cook with are members of the Allium family. These include onions, garlic, leeks and chives. All Allium bulbs and foliage are not only easy to plant, harvest and store, they are downright necessary in the kitchen and provide reliable support for the immune system. Use garlic liberally. It is wonderful for the cardiovascular system and has great immune boosting properties. Don’t be put off by the breath-thing. Good flavor and good health are more important…or chew some mint after. IMPORTANT: to maximize the potency of garlic, chop, mince or slice- then wait 15 minutes before eating. The two chemicals that are beneficial mix together when the flesh of the bulb is cut. It takes 15 minutes for them to reach their most potent point. Try to limit the cooking time. All fruits and veg are most healthy with the least amount of cooking time.

Mine your grocery for shelf-stable items like GROUND flax seeds (don’t bother with flax seeds that are not ground, they simply run through your system with ZERO benefits and they’re costly), chick pea flour and soy flour. Bob’s Red Mill is the BEST!! Look on the internet for 5 pound bags. Local groceries usually only carries one pound bags.
Go to the trouble of making your own granola blend. It’s a fun project to involve the kids in, it’s wonderfully soul-satisfying to eat your own cereal, and YOU control the ingredients that are going into your body! Store in an airtight container on your pantry shelf. Adding things like nuts and dried fruit increase the nutritional content and flavor of your granola blend...Remember that QUALITY dried fruit packs as much a nutritional punch as fresh. The only negative is a slightly higher natural sugar content, but that’s a hair-splitter. Also, dried fruit is shelf-stable, and can be re-hydrated in boiling water poured over it and left to sit for a couple of hours. It’s not an exact approximation of fresh, but still a good choice.


 Stay away from anything processed or artificial. This includes sugars and fats. There are lots of creative choices when in comes to sweeteners. Agave Nectar is America's current darling...think for yourself when considering the expense of Agave Nectar. There is conflicting information about long-term use of this sugar substitute and it has an odd overly-sweet flavor note. Studies show that it contains roughly 1.5x the amount of sugar as compared to cane or beet sugar. In other words a little goes a long way. Go for GRADE B maple syrup (the best to cook and bake with), molasses, sorghum, brown sugar, raw sugar or honey. Check out www.benefits-of-honey.com
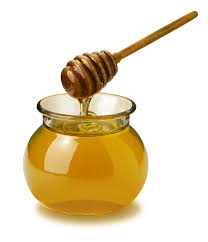
One note on honey. Make sure that it is local or from U.S. farms only! Read the labels carefully. Honey from Asia, South or Central America is not regulated at all. It’s cheaper but can contain dangerous chemicals. Whatever the bee takes to the hive is in the honey.
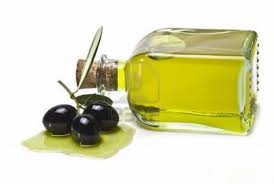
As far as fats go, remember to stick with natural products. Vegetable, nut and seed oils are terrific in dressings, sautes and stir-frys. Olive oil is best for a wide variety of uses, but does have a low smoke point, so is better for cooler cooking techniques. Try to use extra virgin olive oil whenever possible. It’s more expensive, but loaded with Omega-3 fatty acids and flavor! Use canola oil if you want a neutral background flavor. Even butter, especially locally made butter, has wonderful flavor and contributes to nearly any dish. Stay clear of anything that lists Partially-Hydrogenated in it's list of ingredients. Anything partially-hydrogenated is by nature, literally one molecule short of being plastic and can't be efficiently metabolized by the human body.


A whole-food diet is work. There's no way around it. You have to think about what you're putting into your body as well as how best to work with whatever season's offerings you may have at the time. Fresh, local and seasonal meats and produce can also be expensive, adding another component that must be considered. Here are a few tips to help mitigate the effort:

1. Use your Supermarket to help you with some of the work. For example, if you want fresh pineapple, ask the produce manager if there is any fresh cut available. Many markets have “vegetable butchers” on site to help you with this. Buy grains in bulk and store in your own airtight containers. Purchase cheese at the deli section and wrap it yourself; cheese needs to breathe to stay flavorful.

2. Cook meals ahead and store them in the freezer. You are essentially making your own convenience food that will be ready for you when you are ready for it. Convert recipes to make more of each batch.
You can always convert a recipe by this formula: New/old.  For instance, if the yield on a recipe is for 4 portions and you only want one, just divide. If the yield is 3 and you want 10 portions, it is 10/3=3.3, so multiply every ingredient amount by 3.3 and you’ll have the correct quantity for the desired yield. Keep in mind that fractions have to be converted to decimals and then multiplied. Here is a table for fractions to decimals: http://math2.org/math/general/arithmetic/fradec.htm


3. Prep ahead on the weekend or on a quiet evening. Par-cook items ahead so actual cooking time is decreased. Anytime you see the term “Par-cooked, par-boiled, etc” …”par” refers to a light, initial cooking, then cooling and reserving the product for further use.


 4. Contact your county's Ag Extension Office. Ask them for a map of Farmer's Markets. Buy directly from farmers either at Farmer's Markets or from their farm. Be sure to call ahead when visiting farms so someone will be there to help you. CSA (Community Supported Agriculture) programs are also wonderful. For a weekly, monthly or seasonal fee, you get a box of whatever the farm has available all through the growing season. There are produce, meat and dairy CSAs.


 A whole-food lifestyle is a commitment to the health of your body and spirit. Your family and friends will benefit as well. It's not just about eating healthy, real food. It's the pursuit of an understanding of how and where our food grows, is harvested and preserved. It's about appreciating each season and the bounty it offers. A whole-food lifestyle reminds us all that we only have one Earth; the soil of which provides us our health and will sustain us as we sustain it.


Thursday, October 4, 2012

DinnerLove: Kitchen Sink Curry

I ate my first curry before I was 10 years old, at Virginia Plainfield's Restaurant in Portland, Oregon. The table was loaded with condiment tins and plates of Naan. Naan is just one example of the wide variety of flatbreads that are present in the Indian Culinary culture.

Along with flatbreads, many examples of curry are found throughout Southeastern Asian. The people of this region have been adding curry spices to their food for centuries. British colonization and industry in India is credited with spreading this wonderful culinary tradition to the west, including the Caribbean in conjunction with the sugar trade. Even today, the British love their "take-away Curry"!

Americans are familiar with the somewhat ho-hum "curry powder" widely available on most grocery store shelves. American recipes for Curried Chicken, Curried Pork, Vegetable Curry, etc., usually call for a distressingly small amount of this blend of eastern spices. A teaspoon or two is a common recipe amount. In my opinion, you may as well just leave it out if you're going to drop a teaspoon of curry powder into a dish with a yield of 4 servings...you'll never taste it! Convert any recipe with this meager amount of curry from teaspoon to tablespoon!!
Most common yellow curries contain varying mixtures of ground cumin, coriander, turmeric, ginger, red pepper and mustard. This is a great start, but in order to dial up the flavor of your curry, think about adding fresh ginger, fresh garlic, fresh chopped cilantro, citrus zest- specifically lime and lemon- and coconut milk. You can even add a tablespoon or two of garden-variety peanut butter or chopped peanuts to achieve a more Thai-style flavor. The possibilities are just endless; the key is to add layer after layer of flavor until you get the result you're looking for. Curries are multi-dimensional and although hundreds of recipes are available, you should take what you like, along with what you may have on hand, and tinker with it until you're satisfied.
I tend to make what I call "Kitchen Sink Curry". In other words, I take anything I have in the fridge or pantry, chop it, add it to the pot and serve the result over rice. Here is today's curry:

1/2 bag frozen cauliflower
1/2 head of left-over cabbage, sliced
1 large yellow onion, diced
1 russet potato, cubed
1 c. frozen peas
1 box frozen spinach, liquid squeezed out
3 large cloves fresh garlic, minced
1/4 c. bottled lime juice
1 teaspoon powdered ginger
1 TBSP red pepper flakes
1 TBSP lemon pepper
Salt and pepper to taste
Water to cover

Steamed rice
Squeeze the liquid out of the spinach with a clean towel


Caramelize the cauliflower and cabbage,  add the onion and continue to saute. Add the potato, spices, juice and water. Cover and allow to cook on low for about 30 minutes. Add the spinach, peas, garlic and salt and pepper. Cook on low uncovered for 30-60 minutes. Serve over rice.

You may have noticed that most of my ingredients were frozen, powdered or bottled. That's not how I like to cook normally, but that's what I had on hand, so that's what I used. Fresh ingredients are always best, but that's the beauty of curries- they can make any bog standard food shine! Look in your pantry, see what jumps out at you, and make your own Kitchen Sink Curry! Have fun!


Wednesday, October 3, 2012

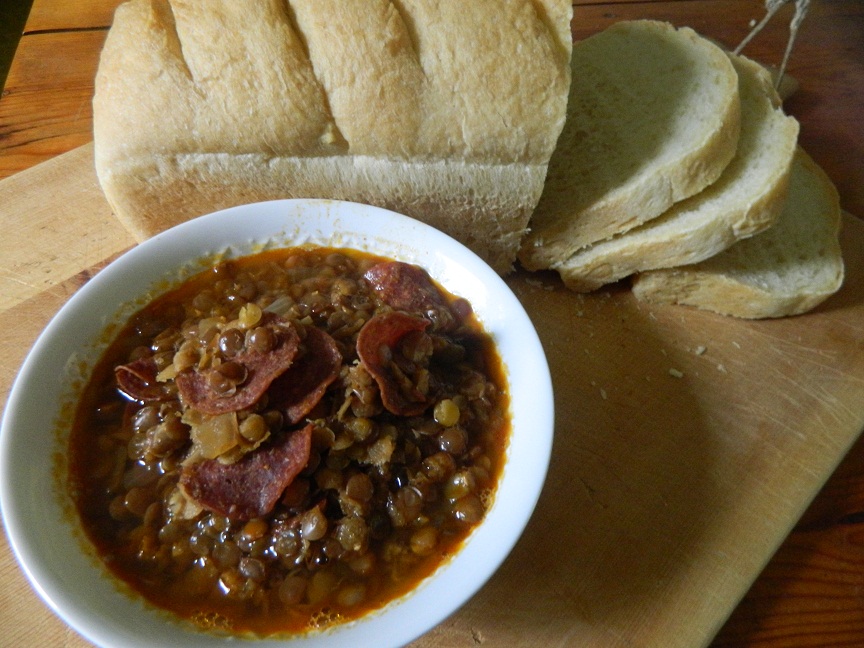
DinnerLove: Lentil & Pepperoni Stew


 In Oregon in the 1970's, my mother eagerly explored the many menu possibilities of the new "back-to-the-land" movement. My sister and I enjoyed Welsh Rarebit, made with local Tillamook cheddar and a touch of Portland's emerging microbeer. We dined on salmon with local fresh dill and potatoes. My mother would scour our woods for sweet woodruff to mix into a light punch that she kept in the refrigerator. While searching for the sweet woodruff, she'd stop by the Oregon Grape bushes at the bottom of our property and pick a bucket-full to make into jam and syrup. There were plastic bags of oats and other grains which she baked into granola.  There was always a tin of trail mix with carob drops and every so often we'd go and pick concord grapes from a friend's farm. We had a cherry tree, an apple tree and a plum tree that lined the driveway, and she'd make the most wonderful preserves from the plums, each glass jam jar covered with a layer of paraffin to seal it against the air.
Galium odoratum, Sweet Woodruff

Along with these wonderful food products, there were newspapers and magazines that were loaded with new and innovative recipes (for the time).  My mother had a subscription to Sunset Magazine, and the Oregonian was delivered every day. Among the piles of recipes she collected, was a little snip of paper taped to a 3x5 index card that was titled: Lentil Stew.
I don't even remember when she started serving this wonderful concoction. I do remember that we always had rustic, heavy, full-grain hearth bread slathered with butter to accompany the stew.  I also remember that there was always enough left over for breakfast the next day. It's a wonderful, healthy, soulful dish that will warm you on cold and warm days alike. Here is my version of the recipe (which is nearly identical except it includes more onions and garlic).

One package of grocery-store sliced pepperoni or whatever kind you like (turkey pepperoni works well, but you'll need to add some oil to the pot)
3 cups lentils or a 1 pound store bag (any kind you like)
2 TBSP paprika
1 TBSP cumin
1 white or yellow onion, diced
3 carrots chopped fine
2-3 bay leaves
3-4 cloves garlic, minced or run through a microplane
2-3 quarts water or stock (chicken, pork or beef work well equally)
1 cup dry vermouth, brandy, vodka, white or red wine, or 1 can of beer (again, whatever you have on hand and like...the trick is to get some alcohol into the mix)
The juice of one lemon or the equivalent bottled amount (if you can't get lemon, don't worry, it just punches up the flavor without adding additional salt.)
Salt and pepper to taste


In a large pot, dump the entire package of pepperoni and allow the fat to render out, on medium for about 20-30 minutes. Add the lentils and stir to coat them in the fat. Add the onions, garlic and carrot. Stir and allow the vegetables to caramelize (add a little olive oil if you see that the mixture is drying out). At this point, add the wet ingredients, including the lemon, and bring to a boil.  Drop in your bay leaves. Cover and simmer for 1-2 hours. This stew will be more soup-like the first day, and thereafter will tighten up to be more stew-like.

This dish also freezes well and is very budget-friendly. Don't just save it for a cold or rainy day. It's wonderful served in a wide pasta dish with a drizzle of EVOO and some grilled flat bread or bruschetta on the hottest summer day!


Tuesday, October 2, 2012

SnackLove: Pumpkin Spiced Whoopie Pies with Maple Buttercream Filling. Yum.


3 c. AP flour
2 tsp baking soda
2 tsp baking powder
2 tsp ground cinnamon
1 tsp ground nutmeg
1 tsp salt
3 c. granulated white sugar
2 sticks butter
1 15 oz can pumpkin puree
2 eggs
2 tsp vanilla

Combine dry ingredients, whisk to incorporate. Beat butter and add sugar. Add eggs, continue to beat for a minute to combine. Add pumpkin and vanilla. Mix gently. Add dry ingredients, stir gently together. Chill in fridge for 1-3 hours. Use ice-cream scoop to scoop onto parchment lined pans. Bake at 350 for 12-15 minutes depending on your oven.

Maple Buttercream filling:
2 sticks room temp butter
2 1/2 cups powdered sugar
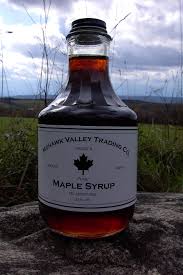
1/2 cup real maple syrup- Grade B has more flavor for cooking/baking uses, but Grade A was all I had! You could also use extract, but I like to buy from my local farms.
Beat all together until mixed and continue to beat until light and fluffy.

Pick cookies that match and spread about 1/4 cup of filling onto the bottom of one. Then top it with it's mate and enjoy! Happy Harvest, everyone!

Monday, September 10, 2012

Boil, Boil, Toil and Trouble

Stocks are the foundational component of Classical French cooking. They are used to build sauces, soups and stews. Prepared properly, they are rich and unctuous, full of many layers of flavors that come from multiple items, gathered together and cooked in a particular way that extracts and showcases all the best aspects of each ingredient. When stock is chilled, it develops a gelatinous quality that is the result of the marrow and connective tissue found in the bones. When reduced, stocks take on a thick, syrupy consistency that is delightful, and impossible to achieve using quick or instant products found on grocery store shelves.

Sometime confused for broth, stocks take time and trouble. Typically, they need to simmer overnight and sometimes for 24 hours, depending on the desired result. When I am cooking at home, I choose chilly days and nights to make stocks because the oven and stove tend to heat up my old Victorian kitchen. Then, I can freeze my stocks for when I need them during the long, hot summer.

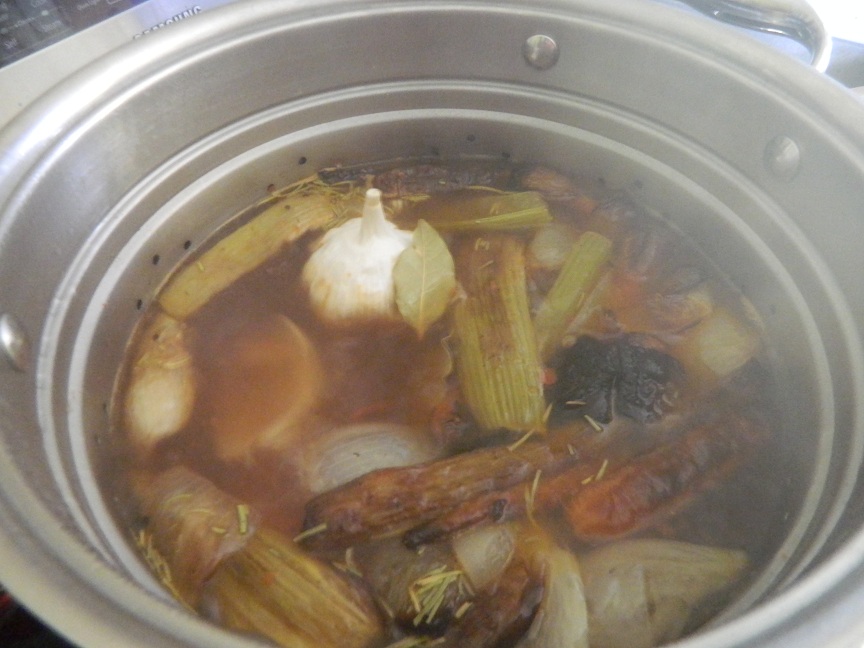
Stocks are composed of animal bones, (usually beef, chicken or fish); mirepoix- which is a French term for the combination of carrot, celery and onion-; tomato paste, bay leaf, thyme and rosemary. Although I was trained in the classical manner at a traditional Culinary School, I like to veer off the conventional path and throw in a head of garlic, a little white wine, and whatever herbs are lurking in my garden. I also tend to leave the skins on my vegetables. My Chef Instructors would shudder at this, but I like the extra color and vitamins this deviation gives me.

The first component is animal bones. The stock I am making today is beef. I was lucky enough to stumble on a wonderful, small, local market that carries a wide variety of proteins. Increasingly, in mainstream markets it is tough and sometimes ridiculously expensive to find plain old bones. Not at Desantis Meat Market & Deli in Barneveld, NY! A bag of 3 hefty leg bones cost around $4.00, and was promptly dropped into my basket and carted home with me. (I also found that Desantis was a source for lovely rabbit...but that's a post for another day.)

Drop your bones and mirepoix into a nice, roomy roasting pan. Drizzle it all with a small amount of extra virgin olive oil, and roast at 400-450 F degrees, depending on the speed of your oven. Bottom line, it's got to be screaming hot.

Roast the ingredients for roughly 30 minutes, or until they are brown and the carmelization of sugars occurs. Remove the pan, and slather the bones with tomato paste. Classically, this step is called "painting the bones". You don't have to use a paintbrush or any brush-like tool. I didn't happen to have one, so I used the back of a wooden mixing spoon. Once this is done, return the pan to the oven. Allow more carmelization to develop, removing the pan and it's contents when the paste and vegetables are brown to dark brown. Don't allow it to shift to the burned category...you'll only have to start over.

Remove the pan's contents into a big stock pot, add water and your desired herbs and set on low to simmer. Place the roasting pan on the stove and set on medium until the remaining oil started to sizzle. Pour water, wine or broth into the pan and scrape the brown bits off the bottom. These bits are called fond, and the process is called deglazing. It is an important step since it removes all of the "stuck-on goodness" and gets it into your stock...you don't want to leave any flavor behind!


Simmer on LOW for at least 12 hours. You can also simmer overnight, if you think your dog won't stick it's nose into the pot and help himself. Strain and store in plastic bags or containers for several days in the fridge, or in the freezer for several months. Use in anything from spaghetti sauce and stew to vegetable beef soup or goat cheese risotto. Have fun and do it your way...just do it!